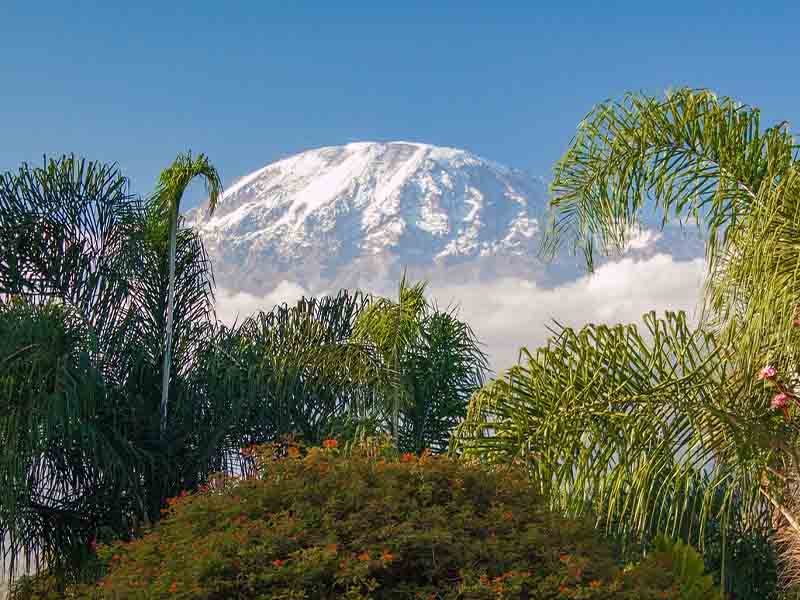
Lemosho Route Mount Kilimanjaro
The Scenic Grand Traverse Highest Summit Success: 98.4% Uhuru Peak • 5,895m (19,341 ft)

Lemosho Route
Kilimanjaro 8 Days & 7 Days

Widely regarded as the most picturesque route on Kilimanjaro. Approaching from the remote western flank at Londorossi Gate, Lemosho grants hikers untouched rainforest, a breathtaking traverse across the volcanic Shira Plateau, and the highest acclimatization success rate on the mountain.

Max Elevation 5,895m (Uhuru Peak)
Recommended Option 8 Days (Unbeatable)
Summit Success 98.4% On 8-Day
Scenery Rating 5 / 5 (Unrivaled)
Western Gate Londorossi Gate
Price Starts At $2,150 / person
Package Selection

Choose Your Lemosho Schedule

Compare our 8-Day gold standard with the 7-Day accelerated variation. Both guarantee full porter team, high-altitude nutrition, and certified lead guides.

Highest Success Rate on Mountain (98.4%)
Option 1 • 8 Days / 7 Nights

Lemosho 8 Days Route

The premier route on Mount Kilimanjaro. Its gradual 8-day profile allows maximum altitude adaptation, making it the top choice for climbers seeking the highest summit likelihood and breathtaking panoramas.

All-Inclusive Rate $2,250 / person
Summit Success 98.4%

Why Choose 8 Days:

  • 8 Days / 7 Nights Comprehensive Expedition
  • 98.4% Documented Summit Success Rate
  • Remote Western Start at Londorossi Gate (2,100m)
  • Traverse Shira Caldera & Cathedral Rock
  • Barranco Wall Scramble & Lava Tower Acclimatization
  • KPAP Certified Fair Porter Treatment
Option 2 • 7 Days / 6 Nights

Lemosho 7 Days Route

An efficient variation that preserves the stunning scenery of the western approach while consolidating the Shira Plateau crossing for climbers with tighter schedules.

All-Inclusive Rate $2,150 / person
Summit Success 94%

Key Characteristics:

  • 7 Days / 6 Nights Expedition
  • 94% Summit Success Rate
  • Scenic Rainforest to Shira Plateau Traverse
  • Full Lava Tower & Barranco Wall Profile
  • Dedicated Wilderness Mountain Guide & Crew
  • Emergency Oxygen & Daily Health Checks
The Wilderness Route

Crossing the Ancient Shira Plateau

The Lemosho Route is universally celebrated for its tranquil beginnings on the mountain’s western flank. Because Londorossi Gate is situated further from the main towns of Moshi and Arusha, the trail sees fewer trekkers during its first three days. The vast Shira Plateau was formed by Kilimanjaro's first volcanic caldera, creating a high alpine desert of dramatic volcanic cones and heather moorland.

Superior Acclimatization

Spending two nights camping between 3,500m and 3,850m allows the body to synthesize red blood cells naturally before joining the Southern Circuit.

Untamed Wildlife

The western montane rainforest is dense and quiet, frequently rewarding hikers with sightings of colobus monkeys, bushbucks, and exotic high-altitude avifauna.
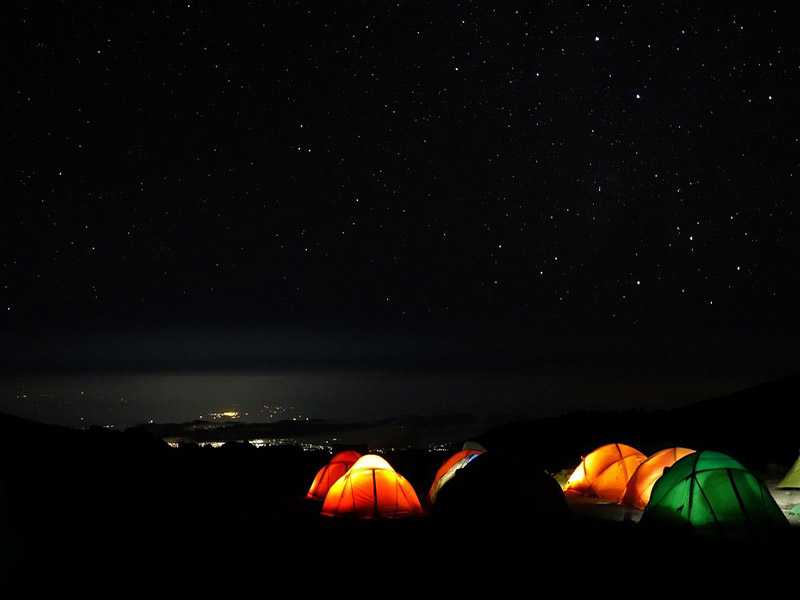
Lemosho Route Campsite
Pristine Wilderness

Expedition tent camping across the high Shira Plateau

Complete Trek Schedule

Day-by-Day Lemosho Itinerary

Day 1

Londorossi Gate (2,100m) to Mti Mkubwa / Big Tree Camp (2,820m)

Habitat: Montane Rainforest
6 km (3.7 miles) 3 - 4 hours +720m ascent

Depart Moshi/Arusha for Londorossi Gate on the pristine western flank. After entry permits, drive to the Lemosho trailhead. Hike through ancient, undisturbed rainforest with Colobus monkeys, tropical birds, and wild orchids to Big Tree Camp.

Details Offered on Day 1

All-Inclusive Standard
Meals Offered

Packed Lunch & Hot Dinner

Breakfast: Lodge buffet breakfast prior to departure
Lunch: Packed trail lunch: Roast chicken, boiled egg, cheese sandwich, fresh fruit & juice
Dinner: 3-Course dinner: Hot vegetable soup, beef curry with rice and vegetables, fresh melon
Accommodation Offered

Mti Mkubwa Camp (Tents)

Private 4-season mountain tent with thick foam mattress, mess tent, and private chemical toilet tent.

Support & Safety Protocol Offered Today:
Wilderness First Responder lead guides (1:2 ratio) Porter team luggage transport (up to 15kg) Daily SpO2 pulse oximeter & altitude checks Hot water basins for washing and boiled drinking water
Key Highlights: Untouched western rainforest trekking Black-and-white colobus monkey wildlife viewing Evening climb briefing
Day 2

Mti Mkubwa (2,820m) to Shira 1 Camp (3,610m)

Habitat: Heath & Moorland
8 km (5 miles) 5 - 6 hours +790m ascent

Leave the forest canopy and climb steep heather slopes. Cross streams and crest the rim of the ancient Shira caldera onto the expansive Shira Plateau. Camp at Shira 1 with dramatic vistas of Kibo.

Details Offered on Day 2

All-Inclusive Standard
Meals Offered

Breakfast, Lunch & Dinner

Breakfast: Cooked breakfast: Porridge, scrambled eggs, sausages, toast & hot drinks
Lunch: Warm lunch: Fresh pasta salad, vegetable spring rolls, soup & fruit
Dinner: Hot dinner: Minestrone soup, grilled chicken, mashed potatoes & sauteed greens
Accommodation Offered

Shira 1 Camp (Tents)

Private 4-season tent on western Shira Plateau with foam mattress and private toilet tent.

Support & Safety Protocol Offered Today:
Guide pacing and acclimatization monitoring Full camp pre-set by porters ahead of arrival Twice-daily pulse oximetry and pulse checks Drinking water refills and hot wash basins
Key Highlights: Crossing from heather forest onto high-altitude volcanic plateau Sunset photography of Kibo peak across the plateau
Day 3

Shira 1 Camp (3,610m) to Shira 2 Camp (3,850m)

Habitat: Alpine Moorland
10 km (6.2 miles) 4 - 5 hours +240m ascent

A gentle, scenic trek across the sweeping plateau towards Kibo’s western glaciers. Optional side-trek to the dramatic Cathedral Rock. The gradual gradient allows optimal red blood cell production with minimal strain.

Details Offered on Day 3

All-Inclusive Standard
Meals Offered

Breakfast, Lunch & Dinner

Breakfast: Energy breakfast: Porridge, pancakes, eggs, fruit & tea/coffee
Lunch: Hot camp lunch: Chicken wraps, potato wedges, fresh salad & fruit
Dinner: 3-Course dinner: Butternut soup, beef stir-fry with rice, steamed veg & dessert
Accommodation Offered

Shira 2 Camp (Tents)

Private 4-season tent at Shira 2 Camp (3,850m) with foam mattress and private toilet tent.

Support & Safety Protocol Offered Today:
Acclimatization pacing across gentle plateau gradient Daily medical checks with pulse oximeter Porter transport and campsite setup
Key Highlights: Traverse ancient Shira volcanic caldera Optional acclimatization excursion to Shira Cathedral Rock
Day 4

Shira 2 to Lava Tower (4,630m) down to Barranco Camp (3,960m)

Habitat: Alpine Desert to Moorland
10 km (6.2 miles) 6 - 7 hours +780m ascent, -670m descent

Key acclimatization day: climb east into alpine desert to Lava Tower at 4,630m for hot lunch. Descend 670m into the giant senecio-filled Barranco Valley, cementing proper altitude adaptation.

Details Offered on Day 4

All-Inclusive Standard
Meals Offered

Breakfast, Hot Lunch at Tower & Dinner

Breakfast: Cooked breakfast: Eggs, sausages, porridge, toast & hot drinks
Lunch: Hot lunch served at Lava Tower (4,630m) in mess tent
Dinner: Multi-course dinner: Cream of leek soup, roast meat/vegetarian pasta & fruit
Accommodation Offered

Barranco Camp (Tents)

Private 4-season tent at Barranco Camp beneath southern glaciers with foam mattress and private toilet tent.

Support & Safety Protocol Offered Today:
Continuous altitude monitoring during Lava Tower climb Daily pulse oximeter check and Lake Louise AMS scoring Hot water bottles for sleeping bags
Key Highlights: Acclimatization trek to Lava Tower (4,630m) Trek through the fairytale giant senecio forest
Day 5

Barranco Camp (3,960m) to Karanga Camp (4,035m)

Habitat: Alpine Desert
5 km (3.1 miles) 4 - 5 hours +75m net gain (via 257m Barranco Wall climb)

Scramble up the Great Barranco Wall with spectacular vistas of Kibo’s southern icefields. Traverse ridges and valleys to Karanga Camp for an afternoon of rest and acclimatization.

Details Offered on Day 5

All-Inclusive Standard
Meals Offered

Breakfast, Lunch & Dinner

Breakfast: French toast, scrambled eggs, porridge, fresh fruit & hot drinks
Lunch: Hot lunch at Karanga Camp: Vegetable pie, salad, chips & fruit
Dinner: High-carb dinner: Tomato soup, spaghetti bolognese, garlic bread & peaches
Accommodation Offered

Karanga Camp (Tents)

Private 4-season tent at Karanga Camp (4,035m) with foam mattress and private toilet tent.

Support & Safety Protocol Offered Today:
Guide spotting and technique assistance on Barranco Wall Half-day trek allowing full afternoon relaxation and altitude adaptation Twice-daily pulse oximetry checks
Key Highlights: Scrambling the Great Barranco Wall Glacier views and afternoon relaxation
Day 6

Karanga Camp (4,035m) to Barafu Base Camp (4,640m)

Habitat: Alpine Desert
4 km (2.5 miles) 3 - 4 hours +605m ascent

Trek across arid alpine desert to Barafu Base Camp. Rest early, eat a high-energy dinner, and prepare gear for the midnight summit push.

Details Offered on Day 6

All-Inclusive Standard
Meals Offered

Breakfast, Lunch & Early Dinner

Breakfast: Cooked breakfast: Porridge, eggs, toast, sausages & hot drinks
Lunch: Warm lunch at Barafu: Vegetable rice, chicken curry, salad & fruit
Dinner: Early pre-summit dinner (17:30): Pasta, light sauce, chicken & hot cocoa
Accommodation Offered

Barafu Base Camp (Tents)

Private 4-season tent on rocky platforms at Barafu Base Camp (4,640m).

Support & Safety Protocol Offered Today:
Full pre-summit gear check and detailed strategy briefing Medical checkup: SpO2, heart rate, and hydration check Midnight wake-up with warm tea and biscuits
Key Highlights: Alpine desert trek with panoramic views of Mawenzi Summit preparation and mental conditioning
Day 7

Summit Day: Barafu (4,640m) to Uhuru Peak (5,895m) to Mweka Camp (3,100m)

Habitat: Arctic Glacial to Rainforest Edge
17 km total (5km up, 12km down) 11 - 15 hours +1,255m ascent, -2,795m descent

Midnight start via Stella Point to reach Uhuru Peak at sunrise. Celebrate at Africa’s highest point before descending to Barafu for lunch and continuing down to Mweka Camp.

Details Offered on Day 7

All-Inclusive Standard
Meals Offered

Summit Snacks, Lunch & Dinner

Breakfast: Midnight snack before push; summit tea and chocolate at Stella Point
Lunch: Celebration lunch at Barafu Base Camp
Dinner: Summit celebration dinner at Mweka Camp
Accommodation Offered

Mweka Camp (Tents)

Private 4-season tent at Mweka Camp (3,100m) in rich forest oxygen.

Support & Safety Protocol Offered Today:
Dedicated guide summit support with emergency oxygen Continuous vital sign monitoring Porter greeting and hot recovery soup
Key Highlights: Sunrise at Stella Point over the African plains Standing on Uhuru Peak (5,895m) - Roof of Africa
Day 8

Mweka Camp (3,100m) to Mweka Gate (1,650m) & Celebration

Habitat: Montane Rainforest
10 km (6.2 miles) 3 - 4 hours -1,450m descent

Descent through cloud forest to Mweka Gate. Official summit certificate presentation, tipping ceremony, and private transfer back to hotel.

Details Offered on Day 8

All-Inclusive Standard
Meals Offered

Breakfast & Celebration Lunch

Breakfast: Full camp breakfast: Eggs, sausages, fruit, bread & hot drinks
Lunch: Celebration farewell lunch with cold drinks at hotel
Dinner: Hotel dinner or personal leisure
Accommodation Offered

Hotel in Moshi / Arusha

Comfortable lodge/hotel in Moshi or Arusha with en-suite hot shower and pool.

Support & Safety Protocol Offered Today:
TANAPA Gold Kilimanjaro Summit Certificate presentation Porter and guide tipping ceremony and celebration song Private transfer from gate to hotel
Key Highlights: Rainforest descent hike Certificate ceremony and celebration
Helpful Advice

Lemosho Route FAQs

The 8-day Lemosho schedule starts at Londorossi Gate on the west and spends multiple days gradually crossing the high-altitude Shira Plateau (3,600m - 3,850m) before tackling Lava Tower. This gives the human body ample time to produce oxygen-carrying red blood cells.
Because the western slopes are less traversed than southern gates, wildlife sightings in the montane forest are more frequent. Trekkers commonly spot black-and-white colobus monkeys, blue monkeys, and signs of eland or buffalo on the lower plateau.
Ready for the Grand Traverse?

Ascend Via Lemosho With Reputable Tours